Thursday, August 13, 2015

Driveway Sealing DIY

Along with sealing the fence the other major maintenance item on my to-do list this summer was to seal the driveway. This was really something I should have done late last summer but never got around to do it. This year I've been planning on doing it for months but it wasn't until this week where the combination of available time and a good forecast (no rain for 48 hours) finally came together to allow me to get it done.

Per the manual that came with the house the driveway needs to be sealed within 6-12 months of paving and resealed every 1-2 years thereafter to keep it from falling apart over time. Several manufacturers sell varying levels of sealants that are supposed to last from 2-8 years with similarly escalating prices. But between what the manual said and similar advice I read on a few places online about needing to do it every two years or so anyway I opted to go for the base level seal. That and I figured if I messed it up and ended up needing to redo it (or pay someone else) I wouldn't have to wait long or be out any more money than need be.

That being said this is the list of supplies I bought for this for my roughly 21x42 foot driveway:
-Five buckets of Latex-ite 2 Year Driveway Coating (In-store price was about $1.50 cheaper than online for whatever reason.) As I note later in the entry I initially only bought four and had to go get a fifth to complete the job. Buy more than you think you'll need and return the rest afterwards if you don't use it.
-Driveway Squeegee (Comes in two pieces - pole and squeegee. I'd get two poles. Mine broke in half.)
-Masonry Brush (For edging)
-Plastic Sheeting
-Painter's Tape
-Driveway Cleaner
-Oil Spot Primer - I bought this just in case but didn't end up needing it and will be able to return it. I had a few spots on the driveway from spraying tire cleaner on my car but they came clean with the power washer.

All together with tax I spent around $115 or so for all of it. I also spent roughly four and a half hours between prep work and application to complete it.

Before shot prior to sweeping and using the power washer.

For prep work I ran the weedwacker along the edges of the driveway then swept it thoroughly. From there using the power washer I borrowed from my in-laws I rinsed it off, sprayed the soap, and then did two passes to rinse it thoroughly. I left our cars in the street overnight so it would be completely dry by the morning. This morning I taped the plastic sheeting to the garage door and also put a piece across the sidewalk to keep them protected from splatters. I used several 2x4s I already had to hold them in place against the concrete lip of the garage and the sidewalk.

A few days ago I turned the buckets upside down so they could mix. Before starting this morning I used an extra five gallon bucket and alternatively mixed up half of two of the buckets of sealant just in case the color varied slightly in each. (From there I periodically mixed in additional sealant from the other buckets when it reached the halfway mark.) Every time I mixed them I gave them a good stir with a spare wooden stake that I had.

My wife took this picture of me this morning as I was mixing up more sealant after doing the edges. It also shows the plastic taped up against the garage door.

From there I used the brush to lay down an edge around the entire perimeter of the driveway. In retrospect it was really only necessary to do it along the edge that meets the garage, the street, and the sidewalk instead of the entire thing. After I did similar to how it shows in the instructional video, dumping the sealant on the driveway and spreading it with the squeegee. I didn't find it quite as easy to do as the video shows and it took a while to figure out the right amount of pressure to use. I also initially spread it a little thicker than I should have and didn't squeegee off enough of the excess in spots leading to visible lines. Because of that I actually ran out before I was finished and despite trying to use the brush to get enough out of the buckets to complete it was left with a small uncovered spot. I had to go back to Home Depot to get another bucket and after it sits upside down overnight I will go back out tomorrow and finish it along with applying a little extra in a few spots that look like they aren't covered enough. As I mentioned on the supply list above the squeegee pole also broke in half toward the end of the driveway making it a little more difficult to spread.

I wore an old pair of shorts, shoes, t-shirt, and a pair of rubber gloves this morning that had to be tossed when I was done. Expect to get dirty doing this. I did however clean off my skin far easier than I expected.

Overall I'm really pleased with how it turned out. It was cheaper than hiring a contractor and not terribly difficult to do. I am curious to see how long it lasts. If I can get two years out of it I'll be satisfied.

The mostly finished driveway. (Still needs the little bit at the end coated.)

Sunday, July 26, 2015

Fence Sealing DIY

Ever since the fence was built last fall I've needed to apply a water seal to protect it. I started on this briefly a few months ago but didn't get a chance to finish. I finally got around to doing so this past week.
I used a five gallon bucket of Thompson's Clear Waterseal to get the job done. In retrospect I should have spent a little more and gotten a slightly tinted version. At times when I was applying it I couldn't quite tell what I had covered or if I had applied enough. (Especially with wearing sunglasses.) I also wasn't sure if it would be enough but I ended up having about a gallon leftover at the end. All told it was roughly 380 feet of six foot tall fence. (Counting both sides.)

To apply it I borrowed a Wagner power sprayer from my father-in-law. (I initially tried using a roller brush but I quickly found this would have taken a long time to complete this way.) Using the sprayer I was able to do all of it in under two hours. It would have been quicker had the paint container had held more. One important thing to note however with going this route. Take the appropriate safety precautions. I wore my sunglasses for eye protection and a respirator to avoid breathing in the spray.
I still need to take a brush to a few spots that I missed or undersprayed. I also need to hand paint the edges of the fence where it meets the house. I avoided spraying too closely lest I cover the siding in sealant.
It's a little hard to tell because it's clear but this was how the fence looked after applying the sealant.

Thursday, July 2, 2015

Deck

When we had our 14 Day Meeting with our sales rep we had priced out what it would cost to have a deck built with the house. At the time however we were on the fence about whether we wanted that or a patio and after the sales rep told us we could get it done cheaper later than what Ryan Homes was going to charge us for it we decided to wait. I've regretted that decision to some extent since then because I felt like we were missing out on full enjoyment of the yard without one. (That and it's a pain to have to move our grill and other things that would normally be found on a deck every time I mow the lawn.) This week that was finally rectified with a 12x16 platform deck.

After some discussion and seeing a platform deck on a friend's house we decided that was the route to go with ours. We liked the look and on top of that it was cheaper (over $1,300 less) than a similarly sized one elevated one with stairs. After getting some quotes we went with the father of a friend from college that owns a deck building company.

Before photo. The steps are a set I built last summer.

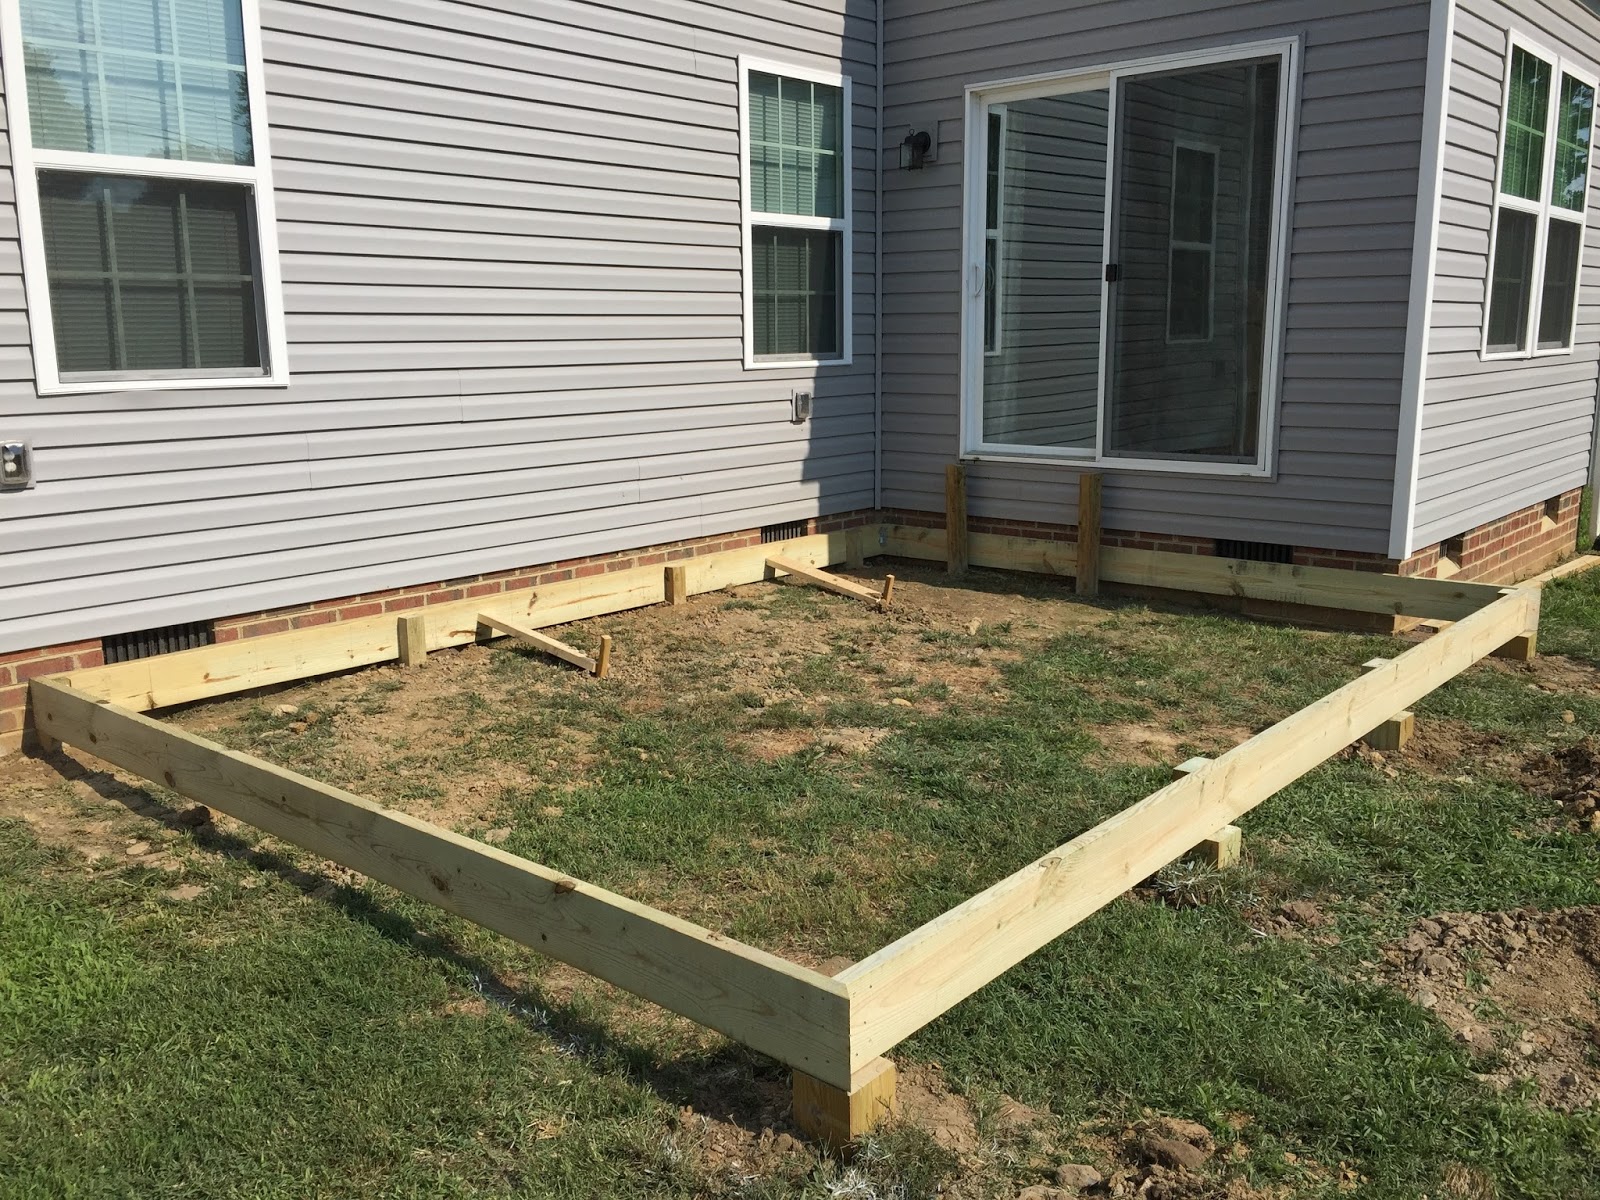
The weekend before the build started.

Digging the post holes. For the holes further away from the house the posts sat on those large concrete blocks.

The holes against the house were dug down to the foundation footer and the posts sat on those. 

All the lumber needed. (It was less than I expected.)


Close up of one of the post holes showing the different layers of dirt.

Day 1 progress. Posts and outline frame completed.

Day 2 progress showing the completion of the frame.

End of Day 2. The diagonal placement of the boards looks so much better than if they were laid straight. 

Day 3: The finished deck.

To say we're happy with the results would be a vast understatement. The builder, Jerry Clay, did an amazing job and it was clear he took a lot of pride in his work and making sure it was done correctly. The diagonal look really sets it apart and I'm told by others takes more experience to do right. Now we just need some furniture for it. 

Wednesday, June 3, 2015

Another Round of Odds and Ends

A collection of recent things from our house.

At our old house we had crape myrtles lining two sides of our backyard. They looked really nice when they bloomed each year. With the exception of the one tree in our front yard that was included with the landscaping we were treeless but we finally fixed that recently. In the past few weeks we've added three trees to our back yard. It started off with planting a flowering cherry tree in one corner and then adding two apple trees (Winesap and Red Delicious) in the other corner. Planting anything in the yard with the amount of rocks in the dirt isn't easy. I have a mattock I bought years ago for use at the old house that's been invaluable anytime I've needed to do any sort of digging.

Flowering Cherry Tree

Apple Trees

Over the Memorial Day weekend I built a new workbench using the 2x4 Basics Workbench Kit. My prior set up was a smaller homemade bench sitting next to another square one that had belonged to Jenny's granddad. The set up didn't work very well for me so I sold the homemade one and moved the square one to the other side of my air compressor. In their place using the aforementioned kit I built a longer bench that is already working out much better. I also went a step further and stained it using a small cheap can of cherry wood stain. Eventually I'm also going to add a frame on top to support a work light using the included shelf link pieces but haven't gotten around to it yet.


Also over the Memorial Day weekend I picked up a miter saw. (Side note: Lowe's will price match Amazon. I saved $20 this way.) I don't do a whole lot of woodworking but when I do it requires pulling out a folding workbench, clamps, and a circular saw along with running an extension cord to cut anything. I used the saw to build the workbench and another stand to hold my yard tools. I really wish I had bought one years ago, it so much easier and quicker to make the cuts needed. Seeing as I have a four inch long scar above my right knee from an incident with an angle grinder years ago I think my wife gets a bit nervous when I get a new power tool.


Back in April I picked up a 22 foot telescoping ladder when it went on sale for 35% off. I mainly needed it to reach the outside dryer vent up on the second floor to clean it and for hanging Christmas lights on the top of the house at the end of the year. I also was finally able to reach the crappy little CFL light bulb Ryan Homes puts in the garage. It didn't put out much light and also took a little while to reach full brightness. I replaced it with a 100 watt daylight LED bulb that Home Depot is selling for $10. (Best price I've seen anywhere.) It made a big difference out there. (Excuse the mess.)


Three other significant upcoming projects: staining the fence and sealing the driveway. I've been putting these off all spring and really need to get them done soon. I'm also going to be adding additional shelving in the garage above the door. We still don't have a shed yet and I've got too much stuff still sitting on the floor. (As the picture above clearly shows.)